It’s Corona-time! Therefore (almost) everybody has a lot of time at home, including me. In order to make the most out of the situation my girlfriend and I decided it was a good idea to invest some time and money into our balcony as we can see this directly from the living room. During the day this is also the part of the house that gets the most sun as it is located at the south side of the apartment. Renovating this part of the house will therefore allow us to enjoy the outdoor weather during the spring/summer and simultaneously improve the view we have from inside the house.
The first step in renovating the balcony was to make a list of things that needed to be done.


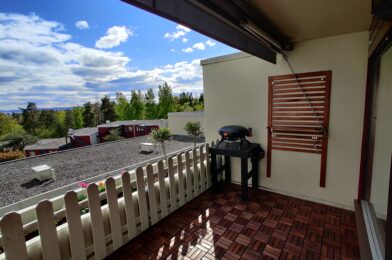
The situation before the renovation
- The floor was rotten, so that needed to be removed. Underneath the wooden floor were stone tiles, which we decided to leave in place as they made a relatively flat surface, were pretty heavy, and we wouldn’t know if the concrete below would require a lot of maintenance (what you don’t know can’t hurt you).
- All the grass in the planter needed to be removed to make room for new plants that look better.
- The walls and planter could do with a paintjob.
- To make the balcony safe(r) a wooden fence was placed onto the planter. To allow for painting, the fence has to be disassembled, and can then painted as well.
- There are plans to do a large overhaul on the balconies and planters in this neighborhood in 1-2 years. One option we considered was to build a terrace similar to the one build on the veranda at the other side of the apartment, however this would have to be destroyed if they start the large overhaul. We therefore decided for IKEA RUNNEN decking, which both looked good and is easy to remove again when necessary.
- Lastly we wanted some nice lounge seats so we could sit outside in the sun.
Preparing the balcony
I started with removing the wooden fences. This was easy as they were hanging on the planter with the help of hooks, and they were only fastened by screws in the bottom. After removing the fence it was time for the grass and the floor. First the grass was gathered in waste bags, after which I cut up the floor in pieces of 90cm (so they would fit perpendicular in the trunk of my car).

Before and after the floor and grass removal
I then could drive all the old flooring to the local landfill. With everything removed it was the perfect time to paint the walls. Both the red and the white had to be done, so on a nice (semi) sunny day I set to work.

To determine the color of the fence I made a 3D model of the balcony in Google Sketchup. In our area there are 3 common colors: red, white and brown/black. The 3D model allowed us to quickly change the color to see what looked best:


In the end, we decided white would look the best. Brown/black made it look like a barcode, while red would not really fit onto the white planter and the trees in the background. We therefore choose to paint the fence white.
The rebuild
It was then time to lay the new floor. The RUNNEN floortiles are very easily clicked into place, and give a very nice result for such a short time. I again made a timelapse of the process, which can be found below:
At this point, we bought some plants and planted those in the planter. After replacing the fence and securing it into place the balcony was almost done.

Lounge set
The last thing that was missing was a nice place to sit and enjoy our newly refurbished balcony. After some consideration we again reverted to IKEA, this time to buy an ÄPPLARÖ 4-seat lounge set.

I’m really looking forward to drink a cup of coffee there during the morning, and to enjoy a beer during the evening. The entire family is happy with how it turned out, and hopefully we’ll get a lot of sunny days this year to enjoy the outdoors!